V release-3.8(blockchain-explorer) Ubuntu 16.04 LTS V release-1.3(fabric-samples)
Contents
本文基于fabric-samples启动的网络,搭建fabric的区块浏览器。Hyperledger项目方提供了blockchain-explorer这个开源的区块浏览器项目,支持fabric。
首先先在机器上安装启动好fabric-samples里的first-network这个网络,具体过程可参考之前的文章fabric-samples实践(搭建first-network)
blockchain-explorer项目依赖:
- nodejs 8.11.x (需要注意的是 v9.x 目前还不支持)
- PostgreSQL 9.5及以上版本
- Jq(
sudo apt-get install jq安装)
安装指定版本的node
node有一个模块n,专门用来管理nodejs的版本,先安装n模块,然后再安装指定版本。安装完成后,可以直接输入n命令,来切换。
# 安装n模块
sudo npm install -g n

# 升级node.js到最新稳定版本
n stable

# 安装指定版本
n v8.11.0

# 切换版本
n
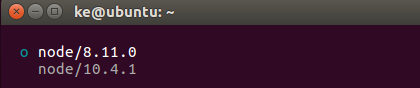
安装完成后,输入n命令,会显示如下界面。使用方向键,可以切换版本,回车确认选择。
postgresql安装和配置
官方下载文档:Linux downloads (Red Hat family)
ubuntu对应的官方安装说明:Linux downloads (Ubuntu)
官方文档还是比较省心,选择版本和系统之后,会显示对应版本的安装说明。
Ubuntu 16.04 LTS:
在指定目录下创建文件/etc/apt/sources.list.d/pgdg.list,并将如下一行添加到文件内:
deb http://apt.postgresql.org/pub/repos/apt/ xenial-pgdg main
导入库的密钥,更新包列表。
sudo apt-get install wget ca-certificates

wget --quiet -O - https://www.postgresql.org/media/keys/ACCC4CF8.asc | sudo apt-key add -

sudo apt-get update

sudo apt-get install postgresql-10

# 验证版本
psql -V
启动postgresql服务。
sudo systemctl enable postgresql

sudo systemctl start postgresql

# 检查是否启动成功
sudo systemctl status postgresq
修改postgeSQL配置,添加访问权限。
先修改/etc/postgresql/10/main目录下的postgresql.conf文件,修改listen_addresses参数。
# - Connection Settings -
listen_addresses='*'
#listen_addresses = 'localhost'
然后修改pg_hba.conf文件,添加如下一行,允许所有IP访问。
# TYPE  DATABASE        USER            ADDRESS                 METHOD
host    all             all             0.0.0.0/0               trust
重新启动postgresql服务:
systemctl restart postgresql
下载blockchain-explorer
我这里使用的v3.8的版本
git clone -b release-3.8 https://github.com/hyperledger/blockchain-explorer.git
数据库安装
hyperledeger项目方已经写好了安装数据库的脚本。区块浏览器的配置文件在blockchain-explorer/app目录下的 explorerconfig.json。
{
  "persistence": "postgreSQL",
  "platforms": ["fabric"],
  "postgreSQL": {
    "host": "127.0.0.1",
    "port": "5432",
    "database": "fabricexplorer",
    "username": "hppoc",
    "passwd": "password"
  },
  "sync": {
    "type": "local",
    "platform": "fabric",
    "blocksSyncTime": "3"
  }
}
包括数据库的配置,有端口号,database为数据库的名称,username为用户名,passwd为密码。可以自定义设置,一般如果本机自己测试,可以无需更改。
sync可以修改平台、区块同步时间等。blockchain-explorer支持Hyperledger Composer、Hyperledger Cello等区块链项目。
设置权限:
打开blockchain-explorer/app/persistence/fabric/postgreSQL目录,运行如下命令更改权限。
chmod -R 775 db/
安装数据库:
cd blockchain-explorer/app/persistence/fabric/postgreSQL/db
./createdb.sh
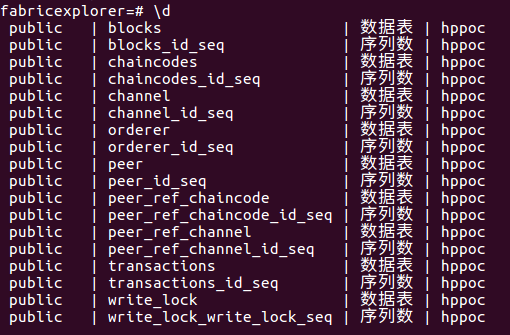
查看数据库:
sudo -u postgres psql fabricexplorer

# 查看创建的表
\d
fabric配置区块浏览器
安装启动运行fabric-sample之后,配置blockblockchain-explorer的相关文件。
在/blockchain-explorer/app/platform/fabric/config.json目录下,修改config.json文件。
将所有的fabric-path关键字,替换为fabric-samples在本机的路径。
build
首先先在blockchain-explorer目录下:
cd blockchain-explorer

npm install
然后在blockchain-explorer/app/test目录下:
cd blockchain-explorer/app/test

npm install

npm run test
之后在blockchain-explorer/client目录下:
cd blockchain-explorer/client/

npm install

npm test -- -u --coverage

npm run build
启动运行区块浏览器
blockchain-explorer/app/explorerconfig.json每次更改完成后,都必须重新启动区块浏览器。
  "sync": {
    "type": "local",
    "platform": "fabric",
    "blocksSyncTime": "3"
  }
type有local和host两种,用以区分同步过程是否运行在不同的位置。
启动
重新打开一个终端,打开blockchain-explorer目录,运行启动脚本。
cd blockchain-explorer/

./start.sh
停止
./stop.sh
运行脚本后,会提示可以查看对应的日志,看启动过程是否有错误。
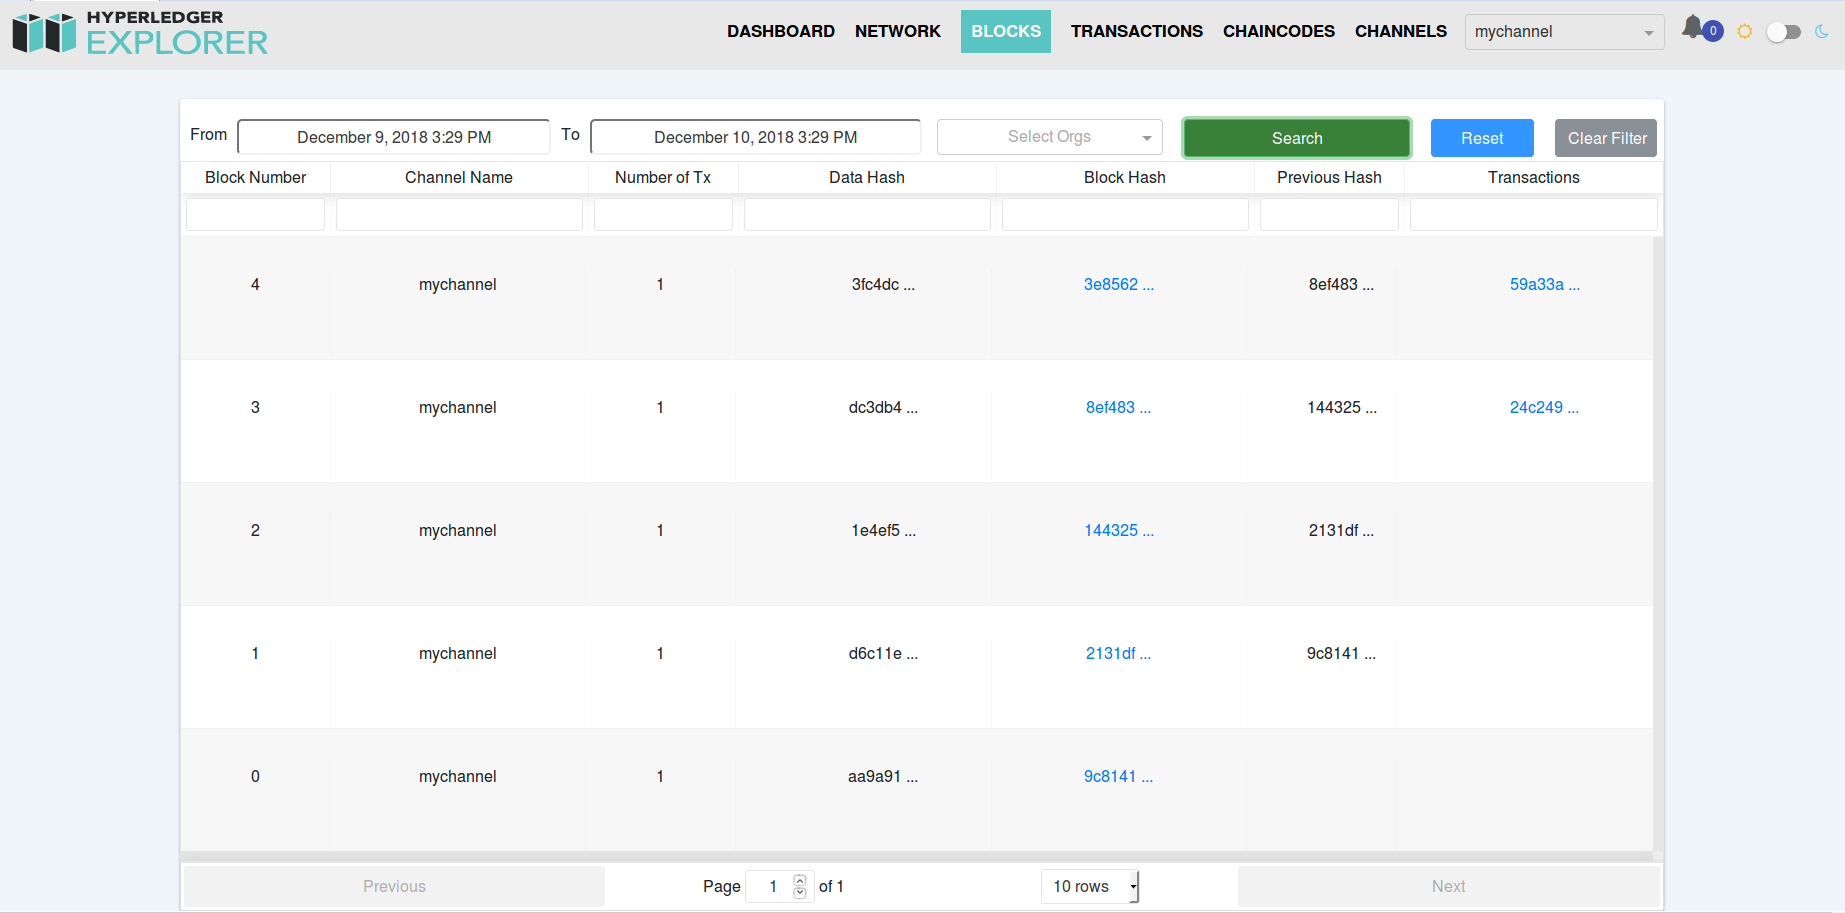
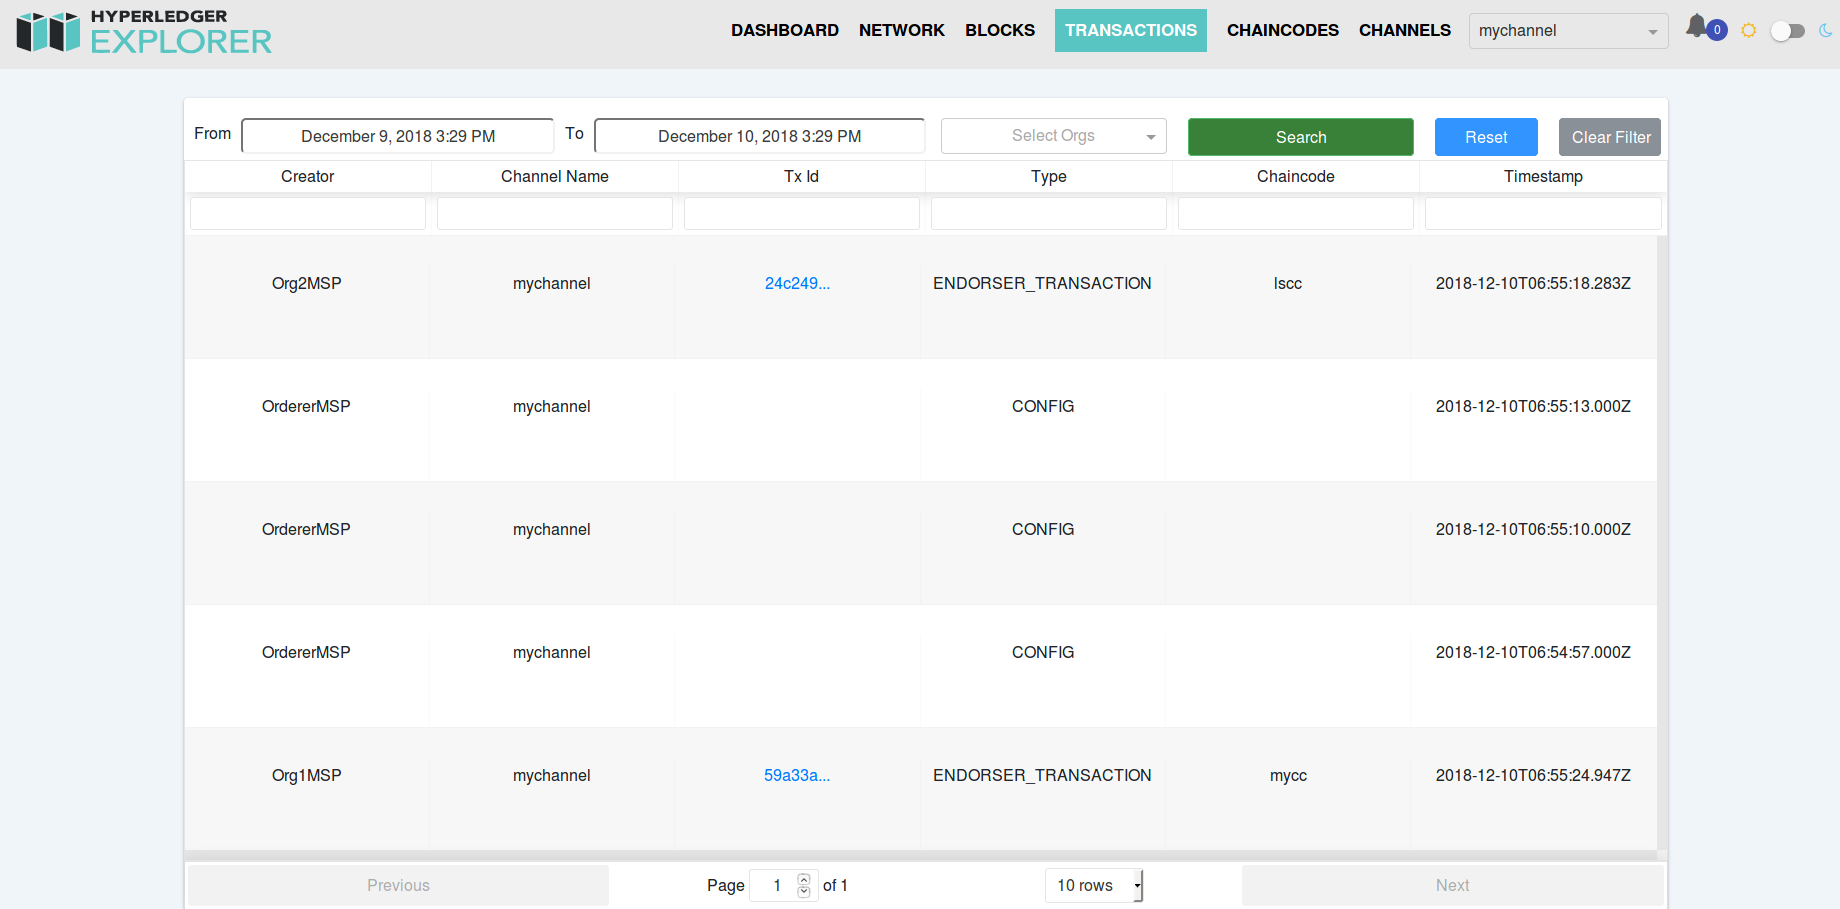
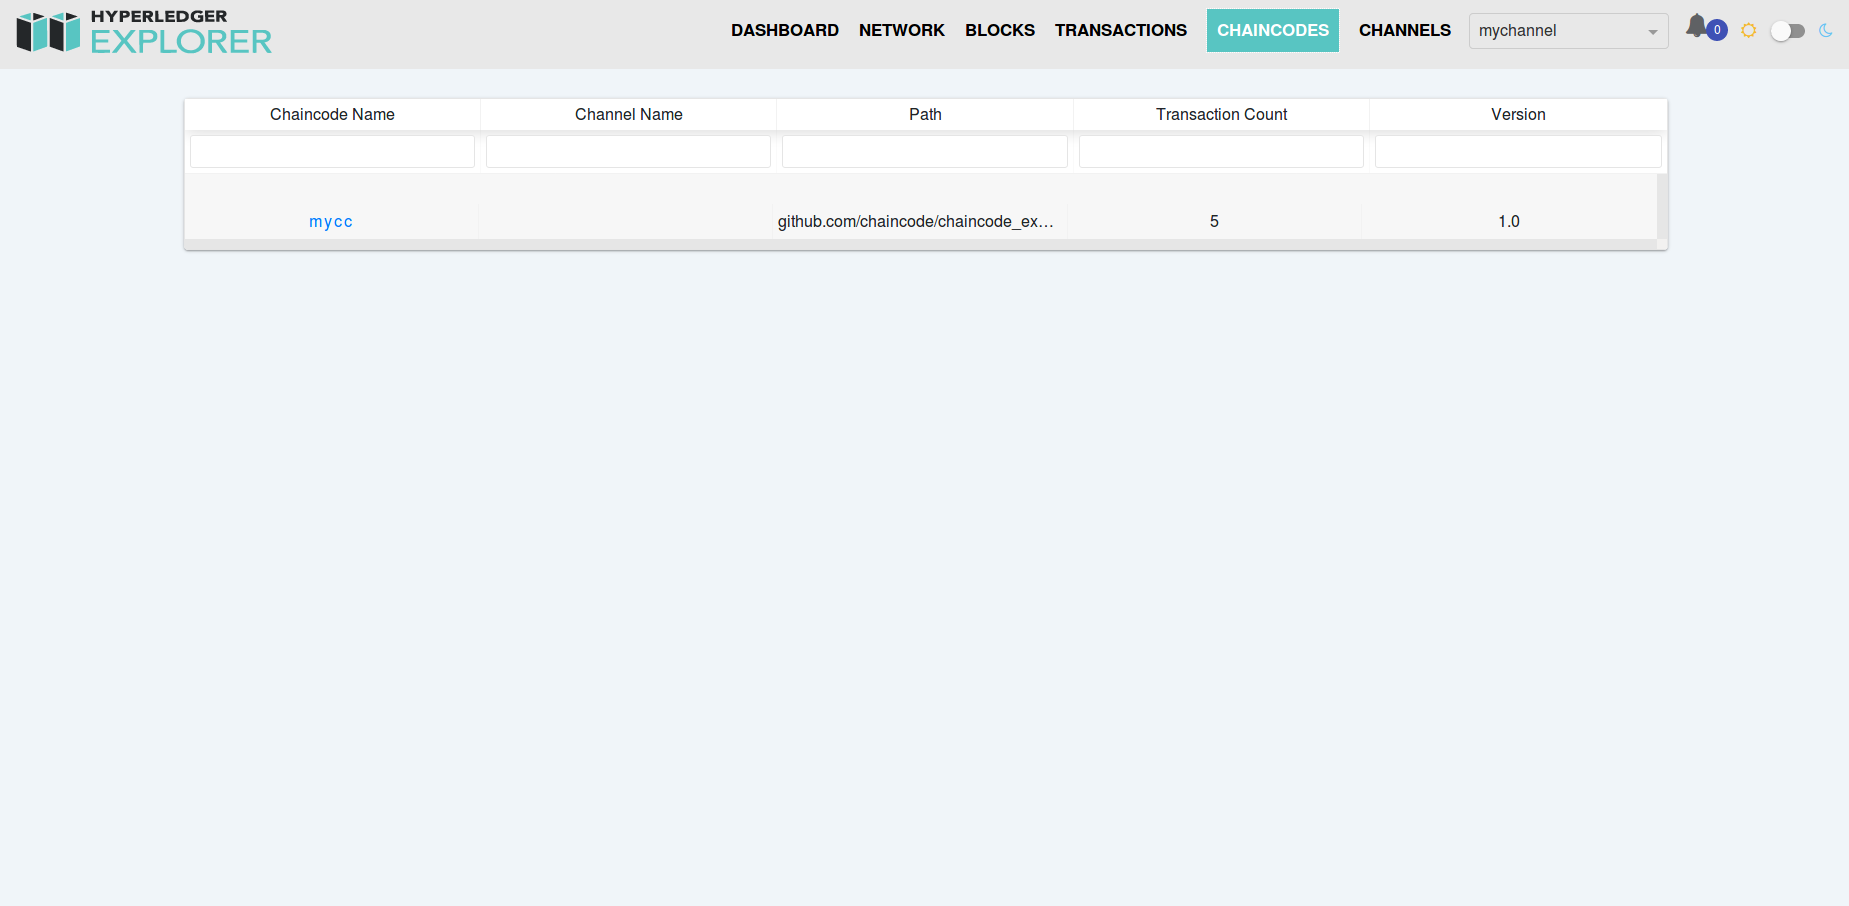
查看区块浏览器
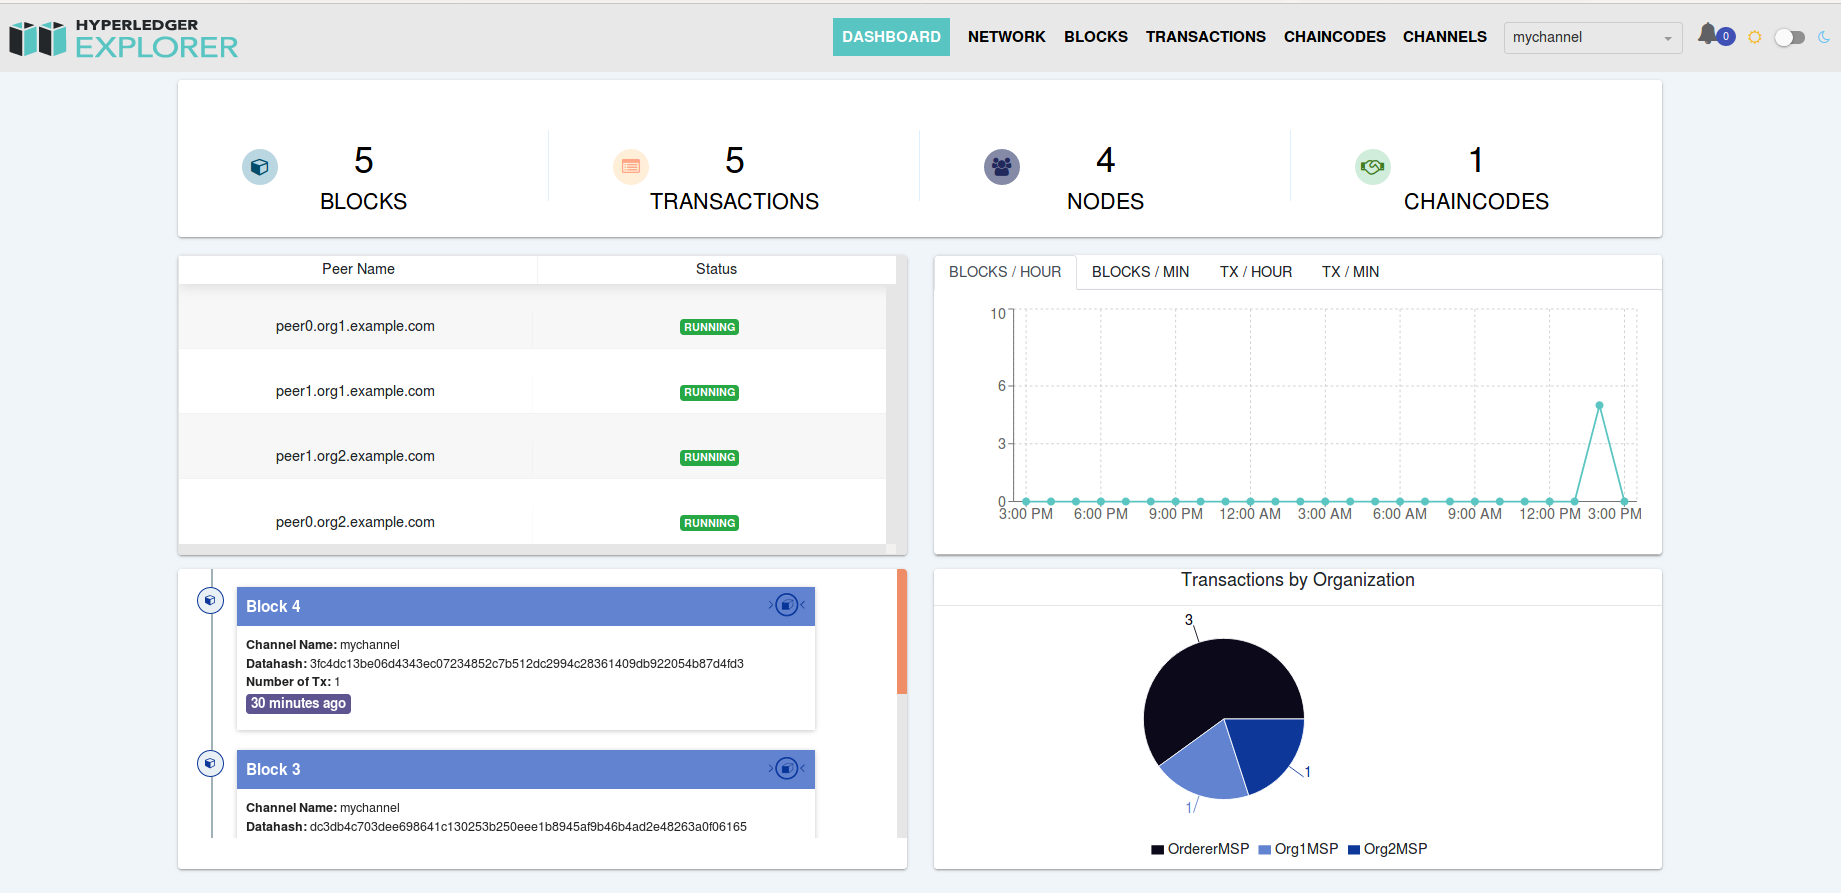
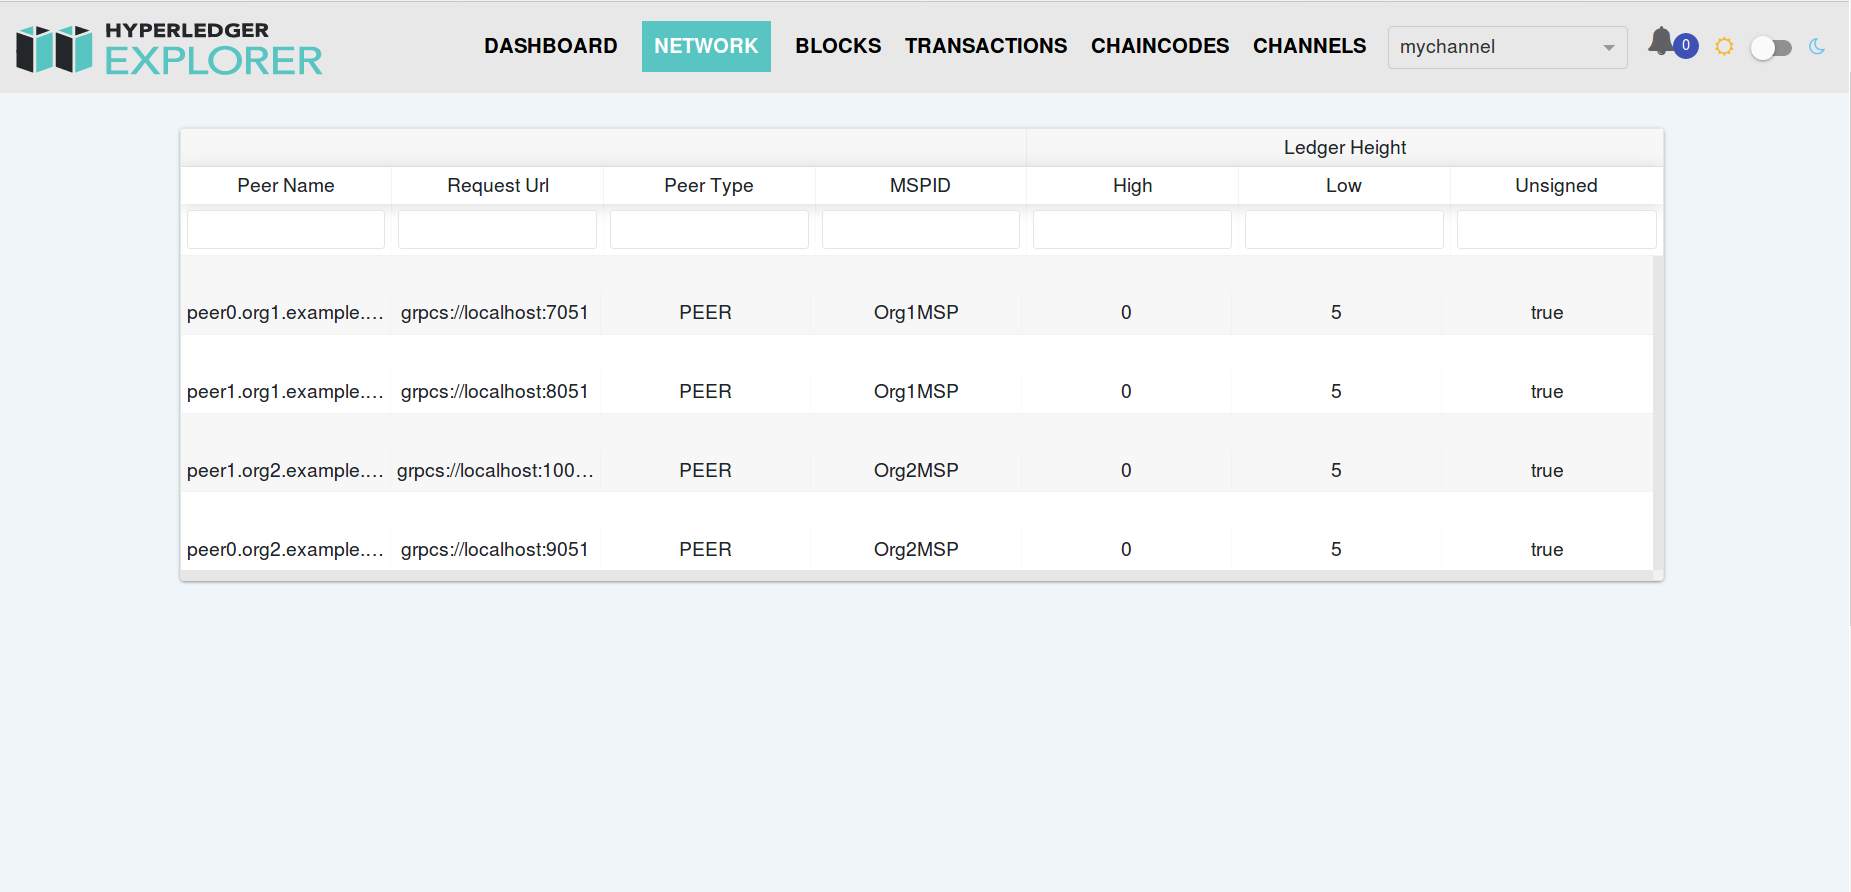
在浏览器中输入http://localhost:8080地址查看,如果正常启动,会出现如下界面。
参考资料:https://github.com/hyperledger/blockchain-explorer/tree/release-3.8


